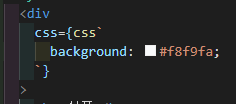
vite react-ts에서 emotion css prop 쓰기
1 | import { defineConfig } from 'vite'; |
1 | { |
1 | import { defineConfig } from 'vite'; |
1 | { |
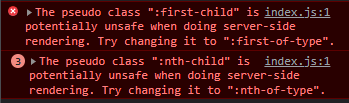
The pseudo class “:first-child” is potentially unsafe when doing server-side rendering. Try changing it to “:first-of-type”.
The pseudo class “:nth-child” is potentially unsafe when doing server-side rendering. Try changing it to “:nth-of-type”.

1 | <style> |
못생긴 기본 스타일을 제거해보자
1 | a, |
1 | .box { |
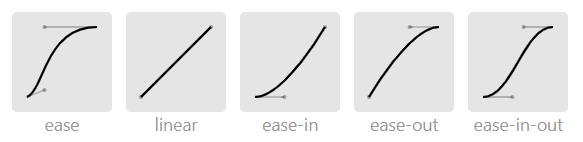
베지에 곡선이라고 한다
ease, in, in-out은 미리 정의어 있는 곡선이다
각각을 cubic-bezier로 표현하면 다음과 같다
layout: false로 설정해 내가 원하는 대로 커스텀할 수 있었다layout: true 레이아웃을 하면서 간단한 css 이펙트를 넣어보자 생각했다내 환경은 다음과 같다
1 | --- |
1 | <style> |
1 | :root { |
:root는 전역 변수를 선언하는 곳이라고 생각하면 된다--을 앞에 붙여야 한다var()함수로 변수를 가져다 사용할 수 있다1 | button { |
var() 함수에 2번째 인자를 넣어서, 대안 값을 지정할 수 있다--a가 정의되지 않았을 때, 두 번째 인자 값을 사용한다:root는 의사 클래스라고 한다🎨 Flat UI Palette v1 | Flat UI Colors 🎨 280 handpicked colors ready for COPY & PASTE