vscode 나만의 스니펫 만들어서 사용하기

상황

  • 여러 테스트 파일을 만드는데, 기본적으로 작성해야 하는 틀이 있다
  • 기본 틀이 되는 코드를 scaffold.test.ts 파일로 만들어서 내용을 복사해서 사용하거나, 복사본을 만들면서 새로운 테스트 파일들을 생성했다
  • 반복하다 보니까 이마저도 불편했다
  • 그러다가 커스텀 스니펫을 만들기로 한다

목표

1
2
3
4
5
6
7
8
9
/**
* problem
*/

describe('id', () => {
test('should ', () => {
expect(solution(prams)).toEqual(er);
});
});
  • 내 목표는 te를 입력하면 내가 등록한 스니펫을 통해 위 코드를 완성시킬 것이다

스니펫 만들기

  • 상단바에서
  • File > Preferences > User Snippets 을 선택한다

  • 어떤 언어에서 만들 것인지 선택한다
  • 나는 타입스크립트에서 사용할 것이다
  • 그러면 %userprofile%\AppData\Roaming\Code\User\snippets\typescript.json이라는 파일이 생성되고
  • 설명과 예제가 나와있다
%userprofile%\AppData\Roaming\Code\User\snippets\typescript.json
1
2
3
4
5
6
7
8
9
10
11
12
13
14
15
16
17
18
19
20
21
22
23
{
// Place your snippets for typescript here. Each snippet is defined under a snippet name and has a prefix, body and
// description. The prefix is what is used to trigger the snippet and the body will be expanded and inserted. Possible variables are:
// $1, $2 for tab stops, $0 for the final cursor position, and ${1:label}, ${2:another} for placeholders. Placeholders with the
// same ids are connected.
// Example:
"cotejs test": {
"prefix": "te",
"body": [
"/**",
"* ${1:problem}",
"*/",
"",
"describe('${2:id}', () => {",
"$0",
" test('should ', () => {",
" expect(solution(${3:prams})).toEqual(er);",
" });",
"});"
],
"description": "base"
}
}
  • prefix ; 나는 te로 설정했다. 스니펫이 어떤 문자열에 추천될지 설정하는 곳이다
  • body ; 내가 완성시키고 싶은 스니펫을 등록한다. 줄 바꿈을 기준으로 배열로 쪼개 줘야 한다
  • description ; 스니펫에 대한 설명을 적는다
  • 특히 자동 완성할 때 tab를 누르면 커서가 원하는 순서로 이동하게 할 수 있다
  • $1, $2, $3,..., $n, $0을 통해서 가능하다
  • 각 커서에 기본값을 추가하고 싶으면 ${1:one} 이런 식으로 가능하다
  • $0은 마지막 커서 위치를 설정할 수 있다

참고

리액트할 때 사용하는 스니펫

  • ES7 React/Redux/GraphQL/React-Native snippets 확장도구에서 제공하는 스니펫을 사용한다

리액트

1
2
3
4
5
6
7
8
// rfce 또는 rfc
import React from 'react';

function App() {
return <div></div>;
}

export default App;

리액트 네이티브

1
2
3
4
5
6
7
8
9
10
11
// rnf
import React from 'react';
import { View, Text } from 'react-native';

export default function App() {
return (
<View>
<Text></Text>
</View>
);
}

참고

vscode console.log() 빨리치기 (snippets extension)

cas→ console alert method console.assert(expression, object)
ccl→ console clear console.clear()
cco→ console count console.count(label)
cdb→ console debug console.debug(object)
cdi→ console dir console.dir
cer→ console error console.error(object)
cgr→ console group console.group(label)
cge→ console groupEnd console.groupEnd()
clg→ console log console.log(object)
clo→ console log object with name console.log(‘object :>> ‘, object);
ctr→ console trace console.trace(object)
cwa→ console warn console.warn
cin→ console info console.info
clt→ console table console.table
cti→ console time console.time
cte→ console timeEnd console.timeEnd

  • clg 를 치고 tab키를 console.log가 자동완성된다
  • 이밖에도 import from 자동완성 등 여러가지가 있다
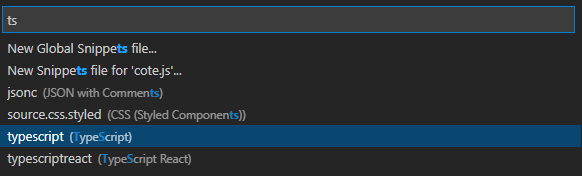
  • ~ snippet 익스텐션을 깔면 사용할 수 있다
  • 나는 다양한 스니펫을 제공하는 ES7 React/Redux/GraphQL/React-Native snippets 익스텐션을 설치해서 사용하고 있다

참고

코드 스니펫 안에 ``` 포함하기

tmp.md
1
2
3
4
5
오호호

```js tmp.js
console.log(1);
```
  • 이렇게 스니펫으로 ``` 을 표현할 수 있다

하는 법

하는법
1
2
3
4
5
6
7
````md tmp.md
오호호

```js tmp.js
console.log(1);
```
````
  • 바깐 스니펫의 ` 개수를 4개
  • 안쪽 스니펫의 ` 개수를 3개로 하면 된다

hosted with ❤ by GitHub로 코드 표시하는 법

Github Gist

  • 전문 용어로 Gist 라고 하며, 코드 블럭을 순수 md로도 표현할 수 있는데 Gist로도 할 수 있다
  • 여기저기 여러 화면에서 중복되어서 씌여지는 코드가 있다
  • 그런데 코드에 오타가 나서 수정을 한다고하자
  • md로 작성했으면 복사 붙여넣기로 인해 일일이 다 수정해야한다
  • 그런데 gist로 작성했으면 그냥 gist에 들어가서 수정하면 다 반영이 된다!

Code Snippet

  • 내용이 되는 코드들을 코드 스니펫이라고 부른다!